

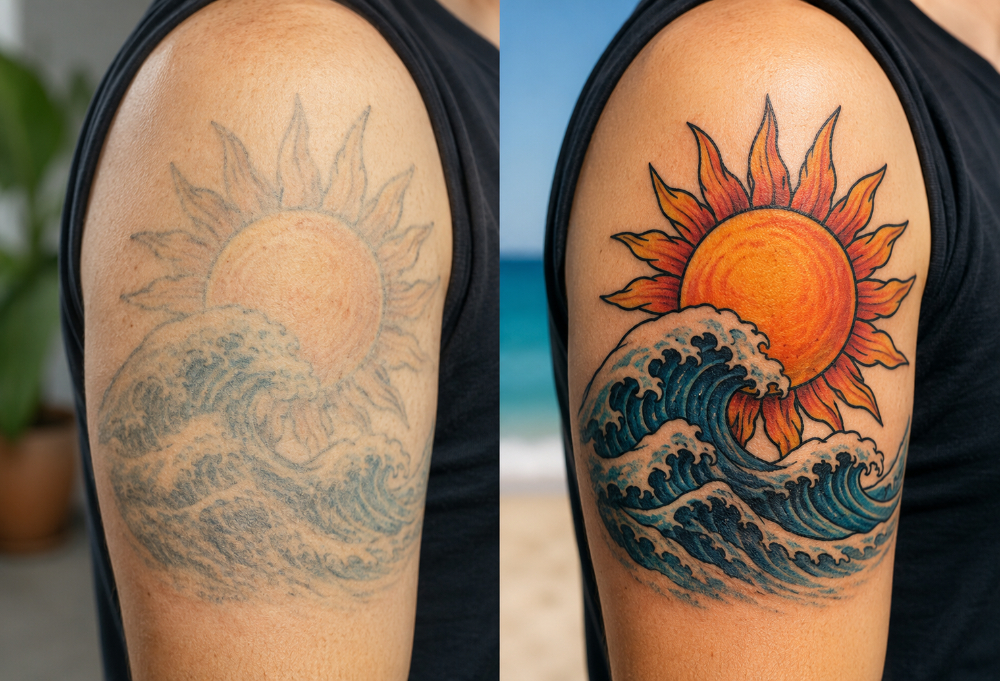
Tattoos are a lifelong investment, both emotionally and financially. Whether you have a sleeve of intricate artwork or a small meaningful symbol on your wrist, the last thing you want is to watch your tattoo fading into a blurry, dull version of what it once was. The good news is that tattoo fading is largely
READ MOREAuthor: admin
What Not to Do After Getting a Tattoo
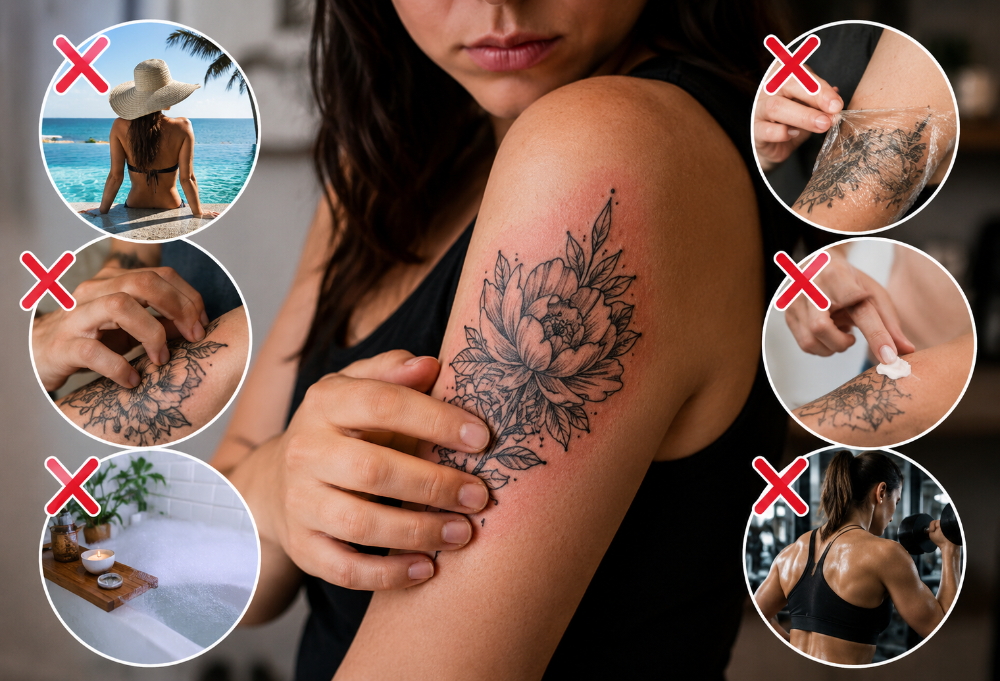
You finally did it. You sat in the chair, endured the needle, and walked out with a stunning piece of art on your skin. But here is the thing most people do not realize: the tattoo process does not end when you leave the studio. What you do in the days and weeks that follow
READ MOREHow Long Can You Sit for a Tattoo Session?
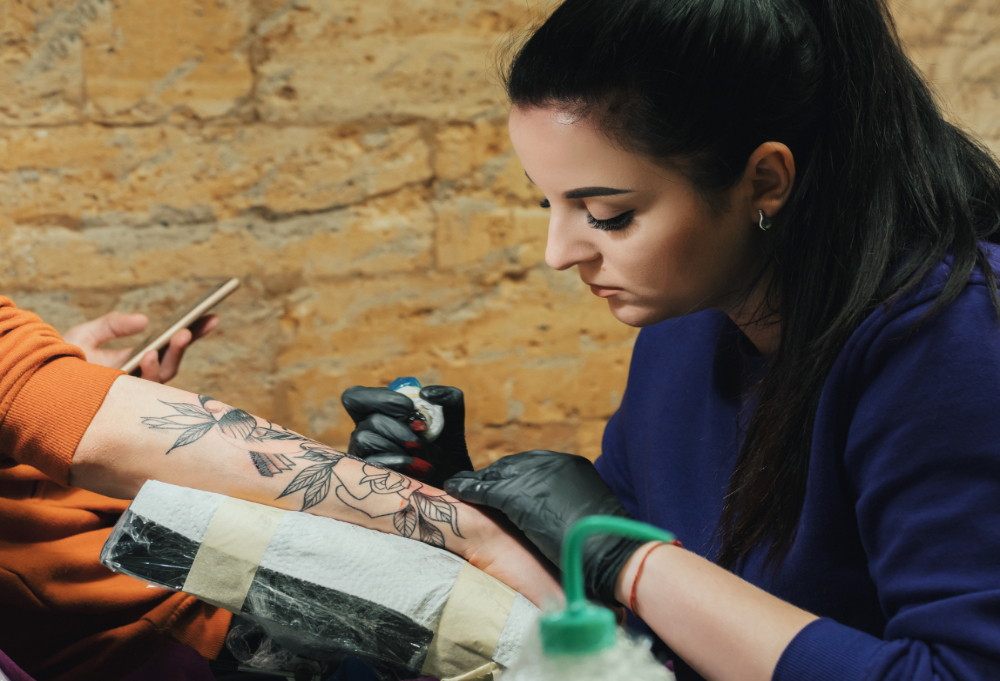
Getting a tattoo is an exciting milestone, but one of the most common questions people ask before booking their appointment is how long can you sit for a tattoo session. The answer is not one-size-fits-all. It depends on your pain tolerance, the complexity of the design, your body chemistry, and your artist’s style. Whether you
READ MOREAre Tattoo Consultations Necessary?
If you have ever thought about getting a tattoo, you have probably spent time scrolling through artist portfolios, pinning reference images, and imagining how the design will look on your skin. But one step that many people skip or overlook is the tattoo consultation. Is it really necessary to sit down with your artist before
READ MORENose Piercing Types Explained: Studs, Hoops, and Placements
Nose piercings have become one of the most popular and versatile forms of body jewelry. Whether someone is interested in a subtle stud or a bold hoop, a nose piercing can add personality and style while remaining relatively simple to maintain. For many people, it is also their first introduction to body piercing, which makes
READ MORETattoos are a lifelong investment, both emotionally and financially. Whether you have a sleeve of intricate artwork or a small meaningful symbol on your wrist, the last thing you want is to watch your tattoo fading into a blurry, dull version of what it once was. The good news is that tattoo fading is largely preventable with the right care habits.
This guide walks you through everything you need to know to protect your ink and keep it vibrant for decades to come.
Understanding Why Tattoo Fading Happens
Before diving into prevention, it helps to understand what causes tattoo fading in the first place. Tattoo ink is deposited into the dermis, the second layer of skin beneath the epidermis. Over time, several factors work against your ink’s longevity.
Sun exposure is the single biggest culprit. Ultraviolet rays break down the pigment molecules in your skin, causing colors to fade and lines to lose their crispness. This is especially true for lighter colors like yellows, pinks, and pastels, which are more vulnerable to UV damage than darker pigments like black and navy blue.
Skin hydration also plays a major role. Dry, flaky skin causes the surface layer to shed more rapidly, which can pull ink closer to the surface and accelerate fading over time. People who live in dry climates or who do not moisturize regularly tend to notice tattoo fading at a faster rate.
Friction is another factor that many people overlook. Areas of the body that experience constant rubbing, such as the inner arms, hands, fingers, and feet, are notorious for fading quickly. The mechanical action of skin rubbing against clothing or other surfaces wears down the ink gradually. Finally, the aging process itself causes the skin to lose elasticity and collagen, which can make tattoos appear less defined over the years.
How to Prevent Tattoo Fading With Sun Protection
If you are serious about how to prevent tattoo fading, sun protection needs to become a non-negotiable part of your routine. Applying a broad-spectrum sunscreen with an SPF of at least 30 to your tattooed skin every single day is one of the most impactful steps you can take.
Many people only apply sunscreen when they are heading to the beach or spending extended time outdoors, but UV rays can damage your ink even on cloudy days or through car windows. A daily SPF habit protects your tattoo whether you are running errands or sitting by a sunny window at work.
For tattoos that are frequently exposed, such as those on the forearms, hands, or neck, look for sunscreens that are water-resistant and fragrance-free to avoid skin irritation. Mineral sunscreens containing zinc oxide or titanium dioxide are particularly effective because they physically block UV rays rather than simply absorbing them.
Wearing protective clothing is another excellent strategy. Long sleeves, UV-protective shirts, and hats can shield tattoos from sun exposure without requiring constant reapplication of sunscreen. This is especially useful during outdoor activities like hiking, swimming, or attending outdoor events.
Moisturizing and Skin Care Habits That Reduce Tattoo Fading
Keeping your skin consistently hydrated is one of the simplest and most effective ways to slow down tattoo fading. When skin is well-moisturized, it maintains a smooth surface that reflects light evenly, making tattoo colors appear more vivid and lines look sharper.
Use a fragrance-free, dye-free moisturizer daily and apply it generously to your tattooed skin. Lotions and creams that contain ingredients like shea butter, glycerin, or hyaluronic acid are excellent choices because they lock in moisture without clogging pores or causing irritation. Coconut oil is a popular natural alternative, though it can feel heavy on the skin for some people.
The timing of your moisturizing routine matters too. Applying lotion immediately after showering, while your skin is still slightly damp, helps seal in hydration more effectively. This small adjustment to your existing routine can make a noticeable difference in the long-term appearance of your ink.
It is also worth paying attention to the products you use on your tattooed skin. Harsh exfoliants, alcohol-based toners, and heavily fragranced body washes can strip the skin of its natural oils and accelerate cell turnover in ways that are not ideal for tattoo preservation. Gentle, hydrating cleansers are a better choice for skin that hosts valuable artwork.
Staying hydrated from the inside matters as well. Drinking enough water each day keeps your skin plump and healthy at a cellular level. While no amount of water intake will stop tattoo fading entirely, a body that is well-hydrated tends to maintain healthier skin overall, which supports the longevity of your ink.
Choosing the Right Tattoo Placement to Avoid Fading
One of the most overlooked aspects of how to prevent tattoo fading actually starts before you even sit down in the tattoo artist’s chair. Placement is a critical factor in how well a tattoo holds up over time.
Areas that are exposed to constant friction or movement tend to fade much faster. Hands and fingers are a prime example. The skin on your hands regenerates quickly and is subjected to washing, friction, and sun exposure on a near-constant basis. Tattoos in this location often require touch-ups within just a few years of being done.
Similarly, feet and ankles are high-fade zones because of the friction from shoes and socks and the way skin in those areas stretches and moves. The inner elbow and backs of knees are problematic for the same reason, as they flex repeatedly throughout the day.
For tattoos you want to preserve long-term, areas like the upper arm, outer forearm, shoulder, upper back, and calf tend to hold ink better. These zones experience less friction, are easier to protect with clothing, and generally have thicker, more stable skin.
If you have your heart set on a high-fade area, talk to your tattoo artist about design choices that hold up better in those spots. Bold lines and solid black tend to outlast delicate fine-line work or color gradients in challenging placements.
Aftercare and Long-Term Touch-Ups for Lasting Color
Proper aftercare during the healing process lays the foundation for a tattoo that resists fading for years. Following your artist’s aftercare instructions is not optional if you want your tattoo to look its best long-term.
In the first few weeks after getting tattooed, keep the area clean and moisturized, avoid direct sun exposure, do not pick at peeling skin, and stay out of pools, oceans, and hot tubs. Submerging a fresh tattoo in water introduces bacteria and can pull ink out of the skin before it has fully set. Picking at scabs or peeling skin does the same thing and can create patchy areas that look faded even before the tattoo is healed.
Even with the best care, some tattoo fading is inevitable over time. This is completely normal, and most artists recommend scheduling a touch-up every five to ten years, depending on how the tattoo has aged. A skilled artist can refresh faded lines, re-saturate dulled colors, and restore the overall crispness of the design.
Touch-ups are significantly less expensive than a full tattoo session, and they can make an older tattoo look almost brand new. Building this into your long-term tattoo care plan removes the disappointment of gradual fading and keeps your investment looking intentional and well-maintained.
Conclusion
Tattoo fading is a natural process, but it is far from inevitable at the rates most people experience. By prioritizing sun protection, maintaining a solid moisturizing routine, choosing smart placements, and committing to good aftercare, you give your tattoos the best possible chance of staying vibrant for years. A little consistency goes a long way when it comes to preserving the artwork you carry with you every day.
Need Custom Tattoos & Piercings Near You?
At Skin Illustrations Tattoo Studio, we’re more than just a tattoo parlor—we’re a creative sanctuary where your ideas, stories, and identity come to life through ink. By offering custom tattoos, an attentive tattoo design process, and a team of passionate tattoo artists, we are proud to deliver exceptional artistry tailored to you. Whether you’re considering floral tattoos, handwriting tattoos, black and gray tattoos, or bold full-color tattoos, reach out to us today and let us help you design something meaningful, lasting, and entirely your own.
You finally did it. You sat in the chair, endured the needle, and walked out with a stunning piece of art on your skin. But here is the thing most people do not realize: the tattoo process does not end when you leave the studio. What you do in the days and weeks that follow will determine whether your tattoo heals beautifully or turns into a faded, patchy regret. Understanding what not to do after getting a tattoo is just as important as choosing the right artist or design.
Tattoo aftercare mistakes are incredibly common, and they happen to first-timers and seasoned collectors alike. The skin has just gone through significant trauma, and it needs time, attention, and the right environment to heal properly. Before you make a move, read through these critical warnings that every new tattoo owner needs to know.
Do Not Skip the Aftercare Instructions Your Artist Gave You
This sounds obvious, but it is one of the most frequent tattoo aftercare mistakes people make. Your tattoo artist gave you specific instructions for a reason. They know the ink they used, the depth of the work, and what your skin needs to recover. Ignoring those instructions, even partially, can lead to infection, ink fallout, and uneven healing.
One of the biggest errors in this category is removing the initial bandage too early or too late. Most artists now use second-skin or saniderm wrap, which should stay on for a specific window of time, typically between 24 and 72 hours depending on the artist’s recommendation. Peeling it off too soon exposes the raw wound to bacteria before a protective layer has formed. Leaving it on too long can trap moisture and create a breeding ground for bacteria underneath.
Another common slip in this phase is using the wrong ointment. Heavy petroleum-based products like Vaseline can suffocate the skin and pull color out of a fresh tattoo. Your artist likely recommended a fragrance-free lotion or a specialized tattoo aftercare balm. Stick with that recommendation and avoid experimenting with products you have lying around the house.
Do Not Expose Your Tattoo to the Sun or Tanning Beds
UV exposure is one of the fastest ways to destroy a fresh tattoo, and it remains a long-term threat even after the tattoo is fully healed. Direct sunlight on a new tattoo can cause serious damage, including blistering, fading, and distortion of fine lines and colors.
During the healing process, which typically takes two to four weeks for the surface layer and up to three months for deeper layers, you should keep your tattoo completely out of the sun. This means wearing loose, breathable clothing that covers the area whenever you go outside. Do not apply sunscreen to a fresh tattoo either. While sunscreen is essential for protecting healed tattoos long-term, putting it on a new tattoo can irritate the open skin and interfere with the healing process.
Tanning beds are just as harmful, if not worse, because they concentrate UV rays in a way that can rapidly break down the pigment in your ink. If you are someone who tans regularly, you will need to pause that habit until your tattoo is fully healed and even then, always apply a high-SPF sunscreen over the area before any UV exposure.
Do Not Soak Your Tattoo in Water
Swimming, long baths, and hot tubs are all on the list of what not to do after getting a tattoo. Submerging a fresh tattoo in water is a serious aftercare mistake that can lead to infection and ink loss.
Pools are treated with chlorine and other chemicals that are extremely harsh on healing skin. Even a brief dip can introduce irritants and bacteria into the open wound, leading to inflammation or worse. Natural bodies of water like lakes, rivers, and the ocean carry bacteria and microorganisms that pose a real infection risk to any open wound, including a fresh tattoo.
Hot tubs are particularly problematic. The combination of heat, chemicals, and the presence of other people makes them one of the riskiest environments for a healing tattoo. The heat alone can open the pores and draw ink out, leading to patchy or faded results.
Even at home, you need to be cautious. Long showers with hot water can soften the skin and loosen ink that has not yet settled. Quick, lukewarm showers are fine, but soaking in a bathtub should be avoided for at least two to three weeks. When washing the tattoo, use your hand with a gentle, unscented soap rather than a washcloth or loofah, which can be too abrasive on tender skin.
Do Not Pick, Scratch, or Peel the Healing Skin
This is one of the hardest tattoo aftercare rules to follow, because healing tattoos itch. As the skin regenerates, it will peel and flake in a way that can feel irresistible to pick at. Resisting that urge is absolutely critical.
When you scratch or pick at a healing tattoo, you are physically removing ink along with the dead skin. This leads to patchy spots, uneven color, and sometimes permanent scarring. Even if it looks like a small flake of skin is barely hanging on, leave it alone. It will fall off naturally when it is ready, and the ink beneath it will be intact.
If the itching becomes unbearable, gently pat the area with a clean hand rather than scratching. Applying a thin layer of fragrance-free moisturizer can also help relieve the sensation. Keeping the skin hydrated during the peeling phase is one of the best things you can do to support even healing.
Tight clothing that rubs against the tattoo can cause similar damage by essentially picking at the skin repeatedly throughout the day. Choose loose, soft fabrics that will not cling to or irritate the area, and avoid any clothing with rough seams or textures over the tattoo site.
Do Not Neglect the Signs of Infection or Allergic Reaction
Knowing what not to do after getting a tattoo also means knowing when something has gone wrong. Some redness and swelling in the first day or two is completely normal, as the skin is responding to trauma. But there are warning signs that go beyond normal healing, and ignoring them is one of the most dangerous tattoo aftercare mistakes you can make.
Signs of infection include excessive redness that spreads beyond the tattoo, warmth or fever in the area, swelling that worsens after the first 48 hours, pus or unusual discharge, and a foul smell coming from the site. If you experience any of these symptoms, do not wait it out. See a healthcare professional as soon as possible.
Allergic reactions are less common but do occur, particularly with certain ink colors like red, yellow, and green, which sometimes contain compounds that sensitive individuals react to. An allergic reaction may present as raised, itchy bumps or hives around the tattooed area. This also warrants a visit to a doctor rather than a self-diagnosed home remedy.
Do not attempt to treat a suspected infection with over-the-counter antibiotic creams without medical guidance, as some of these products can interfere with ink and cause further irritation.
Conclusion
Caring for a new tattoo requires patience and discipline. Understanding what not to do after getting a tattoo can be the difference between vibrant, lasting artwork and a costly touch-up appointment. Avoid common tattoo aftercare mistakes like sun exposure, soaking, picking at the skin, and ignoring your artist’s instructions, and your tattoo will heal into exactly the piece you envisioned.
Need Custom Tattoos & Piercings Near You?
At Skin Illustrations Tattoo Studio, we’re more than just a tattoo parlor—we’re a creative sanctuary where your ideas, stories, and identity come to life through ink. By offering custom tattoos, an attentive tattoo design process, and a team of passionate tattoo artists, we are proud to deliver exceptional artistry tailored to you. Whether you’re considering floral tattoos, handwriting tattoos, black and gray tattoos, or bold full-color tattoos, reach out to us today and let us help you design something meaningful, lasting, and entirely your own.
Getting a tattoo is an exciting milestone, but one of the most common questions people ask before booking their appointment is how long can you sit for a tattoo session. The answer is not one-size-fits-all. It depends on your pain tolerance, the complexity of the design, your body chemistry, and your artist’s style. Whether you are planning a small piece or a full sleeve, understanding what your body can handle will help you prepare mentally and physically for the experience.
Tattoo sessions can range anywhere from 30 minutes for a tiny minimalist design to 8 or more hours for large, detailed work. Some artists and clients push into multiple consecutive days for ambitious projects like back pieces or full-body suits. Knowing your limits before you sit down in that chair is key to making sure your session goes smoothly and your tattoo heals beautifully.
What Is the Average Length of a Tattoo Session?
The average tattoo session typically falls somewhere between 2 and 6 hours. Smaller tattoos, like a simple word, symbol, or small floral design, can be completed in under an hour. Medium-sized pieces with moderate detail, such as a forearm design or a calf wrap, usually take 3 to 5 hours. Large, complex projects like full sleeves, chest panels, or back pieces are often broken into multiple sessions of 4 to 8 hours each.
Your artist will generally give you a time estimate during your consultation, but keep in mind that estimates can shift depending on how your skin takes the ink, how often you need breaks, and how quickly the artist works. Some highly detailed blackwork or realism pieces require exceptional precision, which naturally slows down the process.
For first-timers especially, it is worth having an honest conversation with your tattoo artist about session length. Many artists actually prefer breaking large work into shorter sessions to ensure the quality of the piece stays high and the client remains comfortable throughout the process.
How Long Can You Sit for a Tattoo Before Your Body Gives Out?
This is the core question most people want answered: how long can you sit for a tattoo before your body physically and mentally hits a wall? For most people, that wall appears somewhere around the 4 to 6 hour mark. After this point, the body’s natural adrenaline wears off, the endorphins that initially numb some of the pain start to fade, and fatigue sets in heavily.
Your skin also has a limit. After prolonged tattooing in the same area, the skin becomes increasingly irritated and swollen. Artists refer to this as the skin “blowing out” or becoming too traumatized to hold ink cleanly. A skilled tattoo artist will recognize when your skin has had enough and will recommend stopping for the day, even if you feel mentally ready to push on.
Blood sugar levels play a significant role here as well. Extended sessions deplete your body’s glucose reserves, which can lead to lightheadedness, nausea, and even fainting. This is why many experienced clients bring snacks and electrolyte drinks to long sessions. Eating a solid meal before your appointment is not optional; it is essential, especially if you are planning to sit for more than 3 hours.
Emotional fatigue is another factor people overlook. Sitting still, managing pain, and staying in a fixed position for hours at a time is mentally draining. By hour 5 or 6, many clients find it difficult to stay still, which can affect the quality of the linework. Recognizing your own mental threshold is just as important as understanding your physical one.
How to Sit Through a Long Tattoo Session Without Breaking Down
Learning how to sit through a long tattoo session is a skill that develops over time, but there are strategies you can use from your very first appointment to make the process far more manageable.
Preparation starts the night before. Getting a full night of sleep is one of the most underrated ways to improve your tattoo experience. A well-rested body tolerates pain more effectively than a tired one, and your skin will be in better condition to receive ink. Avoid alcohol for at least 24 hours before your session, as it thins the blood and can cause excessive bleeding, which makes it harder for the artist to work cleanly.
On the day of your appointment, eat a nutritious, filling meal at least an hour before you go in. Complex carbohydrates, proteins, and healthy fats will keep your blood sugar stable for longer. Bring snacks for during the session, particularly things like nuts, granola bars, fruit, or anything that is easy to eat without making a mess or moving too much.
Wearing comfortable, loose clothing that gives your artist easy access to the area being tattooed is another simple but important step. Nothing derails a session faster than having to awkwardly position yourself around tight clothing.
Breathing techniques are surprisingly effective during a long session. Slow, controlled breathing helps regulate your nervous system and reduces the perception of pain. Some people find it helpful to breathe in for 4 counts, hold for 4 counts, and exhale for 4 counts. This rhythmic breathing keeps you calm and focused rather than tensing up against the needle.
Distraction is one of the most powerful tools available to you. Bring headphones and a curated playlist, download a podcast series you have been meaning to start, or queue up an audiobook. Letting your mind drift into a story or music removes your mental focus from the sensation of the needle, making hours feel like minutes.
Communication with your artist is crucial. Never push through severe discomfort silently. A good artist will welcome short breaks and will respect when you need a moment to breathe, eat a snack, or simply shift your position slightly. Taking a 5-minute break every 45 minutes to an hour can dramatically extend how long you are able to sit without your performance declining.
Factors That Affect How Long You Can Realistically Sit
Several individual factors determine how long any given person can handle a tattoo session. Pain tolerance varies widely from person to person and is influenced by genetics, past experience with pain, and your mental state on the day of the appointment.
Placement matters enormously. Certain areas of the body are far more painful than others. The ribs, spine, sternum, inner arm, back of the knee, and neck are notoriously difficult spots, and sessions in these areas tend to feel more exhausting even if they are shorter in duration. Fleshier areas like the outer thigh, upper arm, and calf are generally easier to tolerate for longer periods.
Skin sensitivity is another variable. People with highly sensitive skin may experience more intense pain and faster skin trauma, which limits session length. Those with more resilient skin may be able to push comfortably past the 6-hour mark with the right preparation.
Your history with tattoos also plays a role. First-time clients often underestimate how draining the experience can be, while seasoned collectors have usually learned their personal limits through trial and error. If you are new to tattooing, starting with a shorter session, even if your design could technically be done in one go, is a wise approach that helps you understand your own body’s response.
Conclusion
Understanding how long can you sit for a tattoo comes down to knowing yourself and preparing properly. Most people do well in sessions of 4 to 6 hours, while highly experienced collectors can sometimes stretch to 8 hours with the right mindset and preparation. Learning how to sit through a long tattoo session is about sleep, nutrition, distraction, communication, and listening to your body when it tells you it has had enough. Respect the process, trust your artist, and your experience from start to finish will be far better for it.
Need Custom Tattoos & Piercings Near You?
At Skin Illustrations Tattoo Studio, we’re more than just a tattoo parlor—we’re a creative sanctuary where your ideas, stories, and identity come to life through ink. By offering custom tattoos, an attentive tattoo design process, and a team of passionate tattoo artists, we are proud to deliver exceptional artistry tailored to you. Whether you’re considering floral tattoos, handwriting tattoos, black and gray tattoos, or bold full-color tattoos, reach out to us today and let us help you design something meaningful, lasting, and entirely your own.
If you have ever thought about getting a tattoo, you have probably spent time scrolling through artist portfolios, pinning reference images, and imagining how the design will look on your skin. But one step that many people skip or overlook is the tattoo consultation. Is it really necessary to sit down with your artist before the actual appointment? The short answer is yes, and the reasons go much deeper than you might expect.
Whether you are planning a small minimalist piece or a full sleeve, understanding the tattoo consultation benefits can make the difference between a tattoo you love for life and one you regret within months.
What Is a Tattoo Consultation?
A tattoo consultation is a meeting between you and your tattoo artist that takes place before your actual tattoo session. This meeting can happen in person at the studio, over the phone, or through a video call, depending on the artist’s preferences and your location. During this time, you share your ideas, reference images, placement preferences, and any other details that will shape the final design.
The artist, in turn, uses this meeting to assess the complexity of your idea, ask clarifying questions, and begin thinking about how to bring your vision to life. For a custom tattoo consultation specifically, this step is even more critical. Custom work requires the artist to create an entirely original design tailored to your body, your personality, and your preferences. Without a proper consultation, the artist is essentially working blind, and that is a situation nobody wants.
Most reputable studios require a consultation before booking custom work. This is not just a formality. It is a professional practice that protects both the artist and the client from miscommunication and disappointment.
Why Tattoo Consultation Benefits Go Beyond the Design
It is easy to think of a consultation as being purely about the artwork, but the tattoo consultation benefits extend well beyond choosing a design. One of the most underrated aspects of the consultation is the relationship it builds between you and your artist.
Tattooing is an intimate process. You are trusting someone to permanently alter your skin, and that requires a level of comfort and confidence in the person holding the needle. A consultation gives you the opportunity to gauge the artist’s communication style, professionalism, and enthusiasm for your project. If something feels off during the consultation, that is valuable information. On the other hand, if the artist listens carefully, asks thoughtful questions, and offers creative input, you walk away feeling excited and confident about your upcoming appointment.
Beyond the interpersonal connection, consultations also give you the chance to discuss practical matters that are easy to forget when you are caught up in the excitement of getting tattooed. Topics like session length, pricing, the number of sessions required for larger pieces, aftercare expectations, and touch-up policies are all worth addressing before you sit down in the chair. Understanding these details ahead of time prevents surprises and helps you prepare financially and mentally for the process.
Health considerations are another important element. A good artist will ask about any skin conditions, allergies, or medications that could affect how your skin takes ink or heals afterward. Certain medications thin the blood, which can make tattooing more difficult. Others affect healing. Knowing this information in advance allows the artist to either adjust their approach or refer you to a medical professional if necessary.
The Role of a Consultation in the Custom Tattoo Process
When it comes to custom work, a custom tattoo consultation is not just helpful. It is essential. Unlike flash designs or pre-drawn artwork, custom tattoos are built from scratch around your specific ideas and body. There is no template to fall back on, which means every decision matters.
During a custom tattoo consultation, the artist works with you to understand the story or meaning behind the piece, the style you want (realism, traditional, neo-traditional, blackwork, watercolor, etc.), the size and placement on the body, and how the design should flow with your anatomy. This last point is more significant than many clients realize. A skilled artist does not just slap a design onto your skin. They consider how the tattoo will wrap around curves, how it will age over time, and how it will look from different angles.
Reference images are a major part of this process. Bringing in photos, sketches, screenshots, or even mood boards helps the artist understand your aesthetic preferences and gives them a creative starting point. However, a consultation is also where the artist can push back gently if something will not translate well to skin, offer alternatives, or suggest modifications that will actually improve the final result.
Skipping this step for custom work is one of the most common mistakes first-time clients make. Walking in with just a vague idea and expecting the artist to produce exactly what you imagined without any prior discussion is an unfair expectation for both parties. The consultation is where alignment happens, and alignment is what produces great tattoos.
Common Misconceptions About Tattoo Consultations
Despite the clear tattoo consultation benefits, many people still hesitate to schedule one. Some feel like they do not have enough of an idea yet to warrant a meeting. Others worry the consultation will be awkward or that they will feel pressured into booking something they are not ready for. A few people assume consultations are only necessary for large or complex pieces.
These concerns are understandable but largely unfounded. A consultation is actually one of the best times to come in with an undeveloped idea. Artists are creative professionals. They are accustomed to working with clients who know they want something meaningful but have not fully visualized it yet. Bringing in a rough concept or even just a feeling or theme is completely acceptable. The consultation is precisely the space where those early ideas get shaped into something concrete.
As for feeling pressured, any reputable artist will not push you into booking before you are ready. The purpose of the meeting is to exchange information and see if there is a good fit between your vision and the artist’s skill set. You are not obligated to commit on the spot, and a trustworthy studio will respect that.
The idea that consultations are only for large pieces is also a myth. Even a small, simple tattoo can benefit from a brief conversation about placement, sizing, font choices, or line weight. A few minutes of communication can prevent a lifetime of wishing you had spoken up earlier.
How to Prepare for Your Tattoo Consultation
Getting the most out of your consultation means coming in prepared. Start by gathering reference images that represent the style, mood, or subject matter you have in mind. You do not need to have a fully polished concept, but the more visual reference you bring, the easier it is for the artist to understand your vision.
Think about placement before the meeting. Where on your body do you want the tattoo? Is there a reason for that placement, either aesthetic or personal? Consider the size you have in mind and whether it is realistic for the level of detail you want. Very fine linework in a very small space, for example, can blur over time and may not hold up as well as a slightly larger version of the same design.
Write down any questions you have before the appointment so you do not forget them in the moment. Pricing, session length, healing time, and the artist’s specific aftercare instructions are all worth asking about. Being organized shows the artist you are a serious and respectful client, which often results in a more invested and enthusiastic creative partnership.
Conclusion
A tattoo consultation is one of the most valuable steps in the entire tattooing process, yet it remains one of the most overlooked. The tattoo consultation benefits are wide-ranging, from stronger artist-client communication to better design outcomes and fewer surprises on the day of your appointment. For anyone pursuing custom work, a custom tattoo consultation is simply non-negotiable. It is the foundation on which a great tattoo is built. Do not skip it.
Need Custom Tattoos & Piercings Near You?
At Skin Illustrations Tattoo Studio, we’re more than just a tattoo parlor—we’re a creative sanctuary where your ideas, stories, and identity come to life through ink. By offering custom tattoos, an attentive tattoo design process, and a team of passionate tattoo artists, we are proud to deliver exceptional artistry tailored to you. Whether you’re considering floral tattoos, handwriting tattoos, black and gray tattoos, or bold full-color tattoos, reach out to us today and let us help you design something meaningful, lasting, and entirely your own.
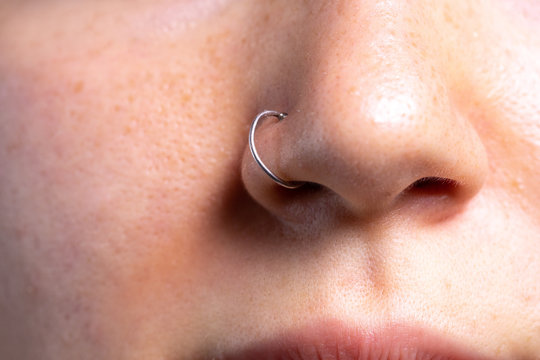
Nose piercings have become one of the most popular and versatile forms of body jewelry. Whether someone is interested in a subtle stud or a bold hoop, a nose piercing can add personality and style while remaining relatively simple to maintain. For many people, it is also their first introduction to body piercing, which makes understanding the different options especially important before stepping into the studio.
If you are considering your first nose piercing, you may already have questions about jewelry types, placement options, and which style works best for your look. Nose piercings offer more variety than most people expect, and choosing the right combination of placement and jewelry can make a big difference in how the final result looks.
Studios like Skin Illustrations-Tattoos take an educational approach when helping first-time clients choose their piercings. By explaining the differences between nose piercing placements and discussing the choice between a nose stud vs. hoop, professional piercers can help clients feel confident and comfortable with their decision. Understanding the basics ahead of time can make the experience much more enjoyable and ensure that your new piercing complements your personal style.
Understanding the Most Popular Nose Piercing Placements
One of the first decisions to make when planning a nose piercing is where exactly the piercing will sit. There are several common nose piercing placements, and each one creates a slightly different aesthetic.
The nostril piercing is by far the most common option. This placement sits along the curve of the nostril and can be positioned slightly forward or further back depending on the client’s anatomy and preference. Nostril piercings are versatile and can accommodate both studs and hoops, making them a popular choice for people getting their first piercing.
Another placement that has gained popularity is the high nostril piercing. This sits slightly higher along the side of the nose, closer to the bridge. High nostril piercings are typically worn with studs rather than hoops due to their position. When paired with a traditional nostril piercing, they can create a stylish layered look.
The septum piercing is another widely recognized option. Located through the thin strip of tissue between the nostrils, septum piercings are often worn with curved jewelry such as circular barbells or rings. This placement offers a bold yet flexible look because the jewelry can sometimes be flipped upward inside the nose if a more subtle appearance is desired.
Each placement offers its own style and personality. Consulting with a professional piercer helps determine which placement works best based on facial features and desired jewelry style.
Nose Stud vs. Hoop: Which One Should You Choose?
Another common question people ask when planning their piercing involves the choice between a nose stud vs. hoop. Both options are popular, but they offer very different visual styles and practical considerations.
Nose studs are often recommended for initial piercings because they are small, lightweight, and less likely to move excessively during healing. A stud typically features a decorative top that sits on the outside of the nose while the post remains inside the nostril. This design allows the jewelry to stay relatively stable while the piercing heals.
Studs also offer a more subtle appearance. Many first-time clients prefer the understated look of a small gemstone or metallic ball that adds a touch of shine without drawing too much attention.
Hoops, on the other hand, create a more noticeable and expressive look. These rings wrap around the edge of the nostril and can range from thin, delicate designs to thicker statement pieces.
While hoops are very popular, professional piercers often recommend waiting until the piercing has fully healed before switching from a stud to a hoop. Because hoops move more freely, they can irritate a fresh piercing if inserted too early.
Both jewelry styles have their advantages, and many people eventually experiment with both options once their piercing has healed.
How Placement and Jewelry Work Together
The relationship between jewelry style and piercing placement plays a significant role in the overall appearance of a nose piercing. Certain placements naturally pair better with specific types of jewelry.
For example, a traditional nostril piercing is extremely versatile and works well with both studs and hoops. This flexibility is one of the reasons it remains the most common choice for first-time piercings. Clients can begin with a stud and later experiment with hoops once healing is complete.
High nostril piercings tend to favor stud-style jewelry due to their position on the nose. The higher placement makes it difficult for hoops to sit comfortably without interfering with the shape of the nose.
Septum piercings also offer their own unique jewelry options. Instead of traditional studs or hoops, septum jewelry often includes circular barbells, captive bead rings, or decorative clicker rings. These designs allow for creative expression while fitting comfortably within the septum area.
When clients visit Skin Illustrations-Tattoos, professional piercers take time to discuss how placement and jewelry interact. This helps ensure that the final piercing matches both the client’s aesthetic goals and the natural shape of their nose.
What First-Time Clients Should Know Before Getting Pierced
Getting a nose piercing for the first time can feel exciting, but it also helps to understand the process beforehand. Knowing what to expect can reduce nervousness and help ensure a positive experience.
Professional piercing studios begin with a consultation where the piercer discusses placement options and jewelry choices. During this conversation, clients can ask questions about nose piercing placements and explore whether they prefer the look of a nose stud vs. hoop.
After the placement is selected, the piercer carefully marks the location to ensure proper alignment and symmetry. Clients are given an opportunity to review the placement in a mirror before the piercing begins.
The actual piercing process itself is quick. Professional piercers use sterile equipment and single-use needles designed specifically for body piercing. The procedure typically takes only a few moments.
Healing times vary depending on the individual and the placement, but nostril piercings generally take several months to fully heal. During this period, following aftercare instructions is essential for preventing irritation and supporting proper healing.
Experienced studios prioritize both safety and comfort throughout the process, making the experience approachable even for first-time clients.
Choosing a Professional Studio for Your Piercing
Selecting the right piercing studio is one of the most important decisions when planning a new piercing. Professional studios provide not only the technical skill needed for accurate placement but also the guidance necessary for a safe and comfortable experience.
Skin Illustrations-Tattoos focuses on an educational and style-forward approach when working with clients. Their team understands that many visitors are getting their first piercing and may feel uncertain about their options.
By explaining different nose piercing placements and helping clients understand the differences between a nose stud vs. hoop, the studio helps individuals choose a look that fits their personality and comfort level.
Professional piercers also maintain strict hygiene and sterilization practices. Using high-quality jewelry and sterile tools helps reduce the risk of complications and ensures that each piercing is performed safely.
In addition to technical expertise, experienced studios help clients feel confident in their style choices. Whether someone prefers a subtle stud or a more eye-catching hoop, having a knowledgeable piercer available to offer guidance makes the process much smoother.
A nose piercing can be a meaningful form of self-expression and a stylish addition to your personal look. By learning about the different placement options and jewelry styles, first-time clients can approach the experience with confidence and excitement.
With the right studio, proper guidance, and a clear understanding of your options, your first nose piercing can be a smooth and memorable introduction to body art.